Guide to repairing a punctured tyre Part 1: How to repair

Guide to repairing a punctured tyre part 1: how to repair

Repairing your own bicycle might seem like a daunting task. Fear not! Learn how to repair a punctured tyre in a quick and fuss-free manner.

A punctured bicycle tyre is one of the most common mechanical mishaps in cycling.

It plagues all riders - from the humble weekend warrior to the champion of Tour de France!

Read on to find out how you can be prepared for the inevitable, and not get stuck on the roadside desperately hailing a cab.

Do take note that this guide will only cover tyres using inner tubes, not tubeless nor tubular tyres.

Step 1: getting the essentials

Before attempting to perform any repairs on your beloved bicycle, it is paramount to ensure that you have all the required tools and spare parts for the job. In the case of repairing a puncture you will require the following:

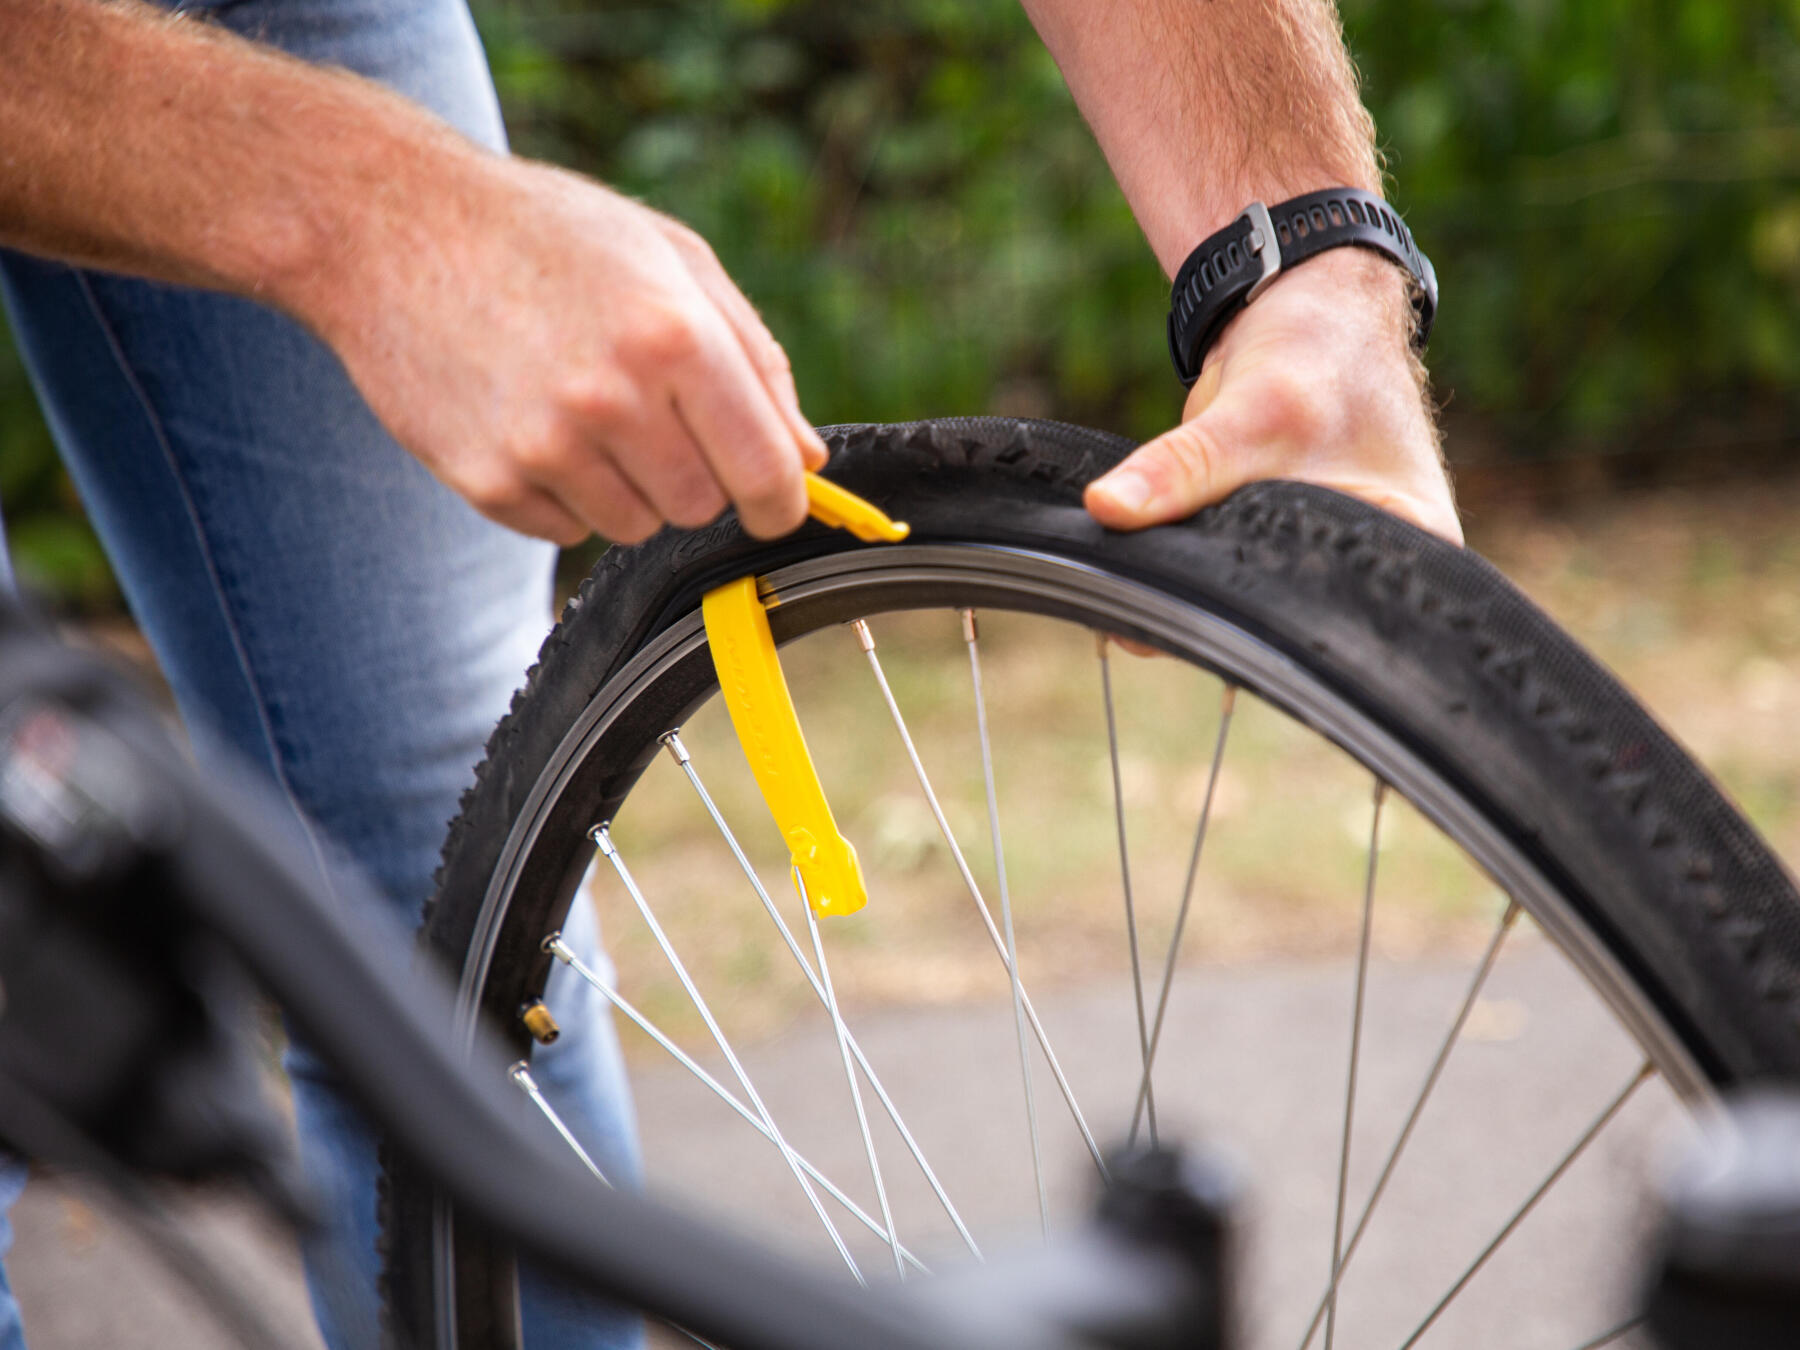
1. A set of tyre levers
2. A new inner tube or puncture repair kit
3. A pump to inflate the tyres

We will go deeper into the specifications of inner tubes in part 2, just take note that the new inner tube should be of the same size and similar width to the pre-existing inner tube on your bicycle. On top of that, the type of valve on the inner tube should also be identical to the one used on your bicycle. Once again, this will be explained in greater detail in the next part of this series.

Guide to repairing a punctured tyre Part 1: How to repair

Step 2: removing the tyre

- Remove the affected wheel
If possible, prop your bicycle up against a wall or flip it upside down. Be wary of scratching your handlebars or saddle on the ground!

*Depending on the type of brakes you have on your bike, the method of removing the wheel may vary.

- Take off the plastic valve cap and grab your tyre levers
Using your hands first, dislodge the bead of the tyre from the rim. You should be able to see a gap between the tyre and the rim. Insert your tyre lever to lever out the tyre from the rim through this gap.

- Dislodge the tyre
Once you've managed to get one lever into the tyre, latch it onto one of the spokes to free up your hands.

Use the other tyre levers in a similar fashion until you've dislodged enough of the tyre to allow you to slide the lever along the tyre, dislodging that side completely from the wheel.

Step 3: replacing the inner tube

- Remove the damaged innertube
Once you've dislodged one side of the tyre from the wheel, remove the damaged innertube starting from the side opposite the valve. You can now start preparing the new innertube.

- Prepare the new innertube
Start by very slightly inflating the new tube, this will help it to keep its shape while you insert it into the tyre.

- Seat the tyre back on the rim
This process should be the opposite of how you took the tube out, so you start with the valve. As you roll the inner tube under the tyre, you should simultaneously sit the tyre back onto the rim. It may get a little difficult as you approach the last part of the tyre. At this point you may either persevere with your bare hands, or use your tyre levers. 

*Note that using the tyre levers will increase the risk of you puncturing your tube by pinching it between the tyre and the rim.

- Re-inflate the tyre 
If you're unsure of the pressure to pump your tyres to, just check the sides of the tyre. It should inform you of a minimum and maximum pressure. 

While pumping the tyre up, it is a good idea to pause around 20psi to ensure that the innertube is not sticking out between the tyre and the rim. If it is, deflate the tyre and adjust it appropriately.

When you have reached the desired pressure, replace the valve camp and re-attach the wheel to the bicycle. Do not forget to close your brakes if you had to open them to remove the wheel earlier.

Guide to repairing a punctured tyre Part 1: How to repair

Step 4: continue your ride!

Now that you've repaired your puncture, it's time to get back on your bike and continue the ride!