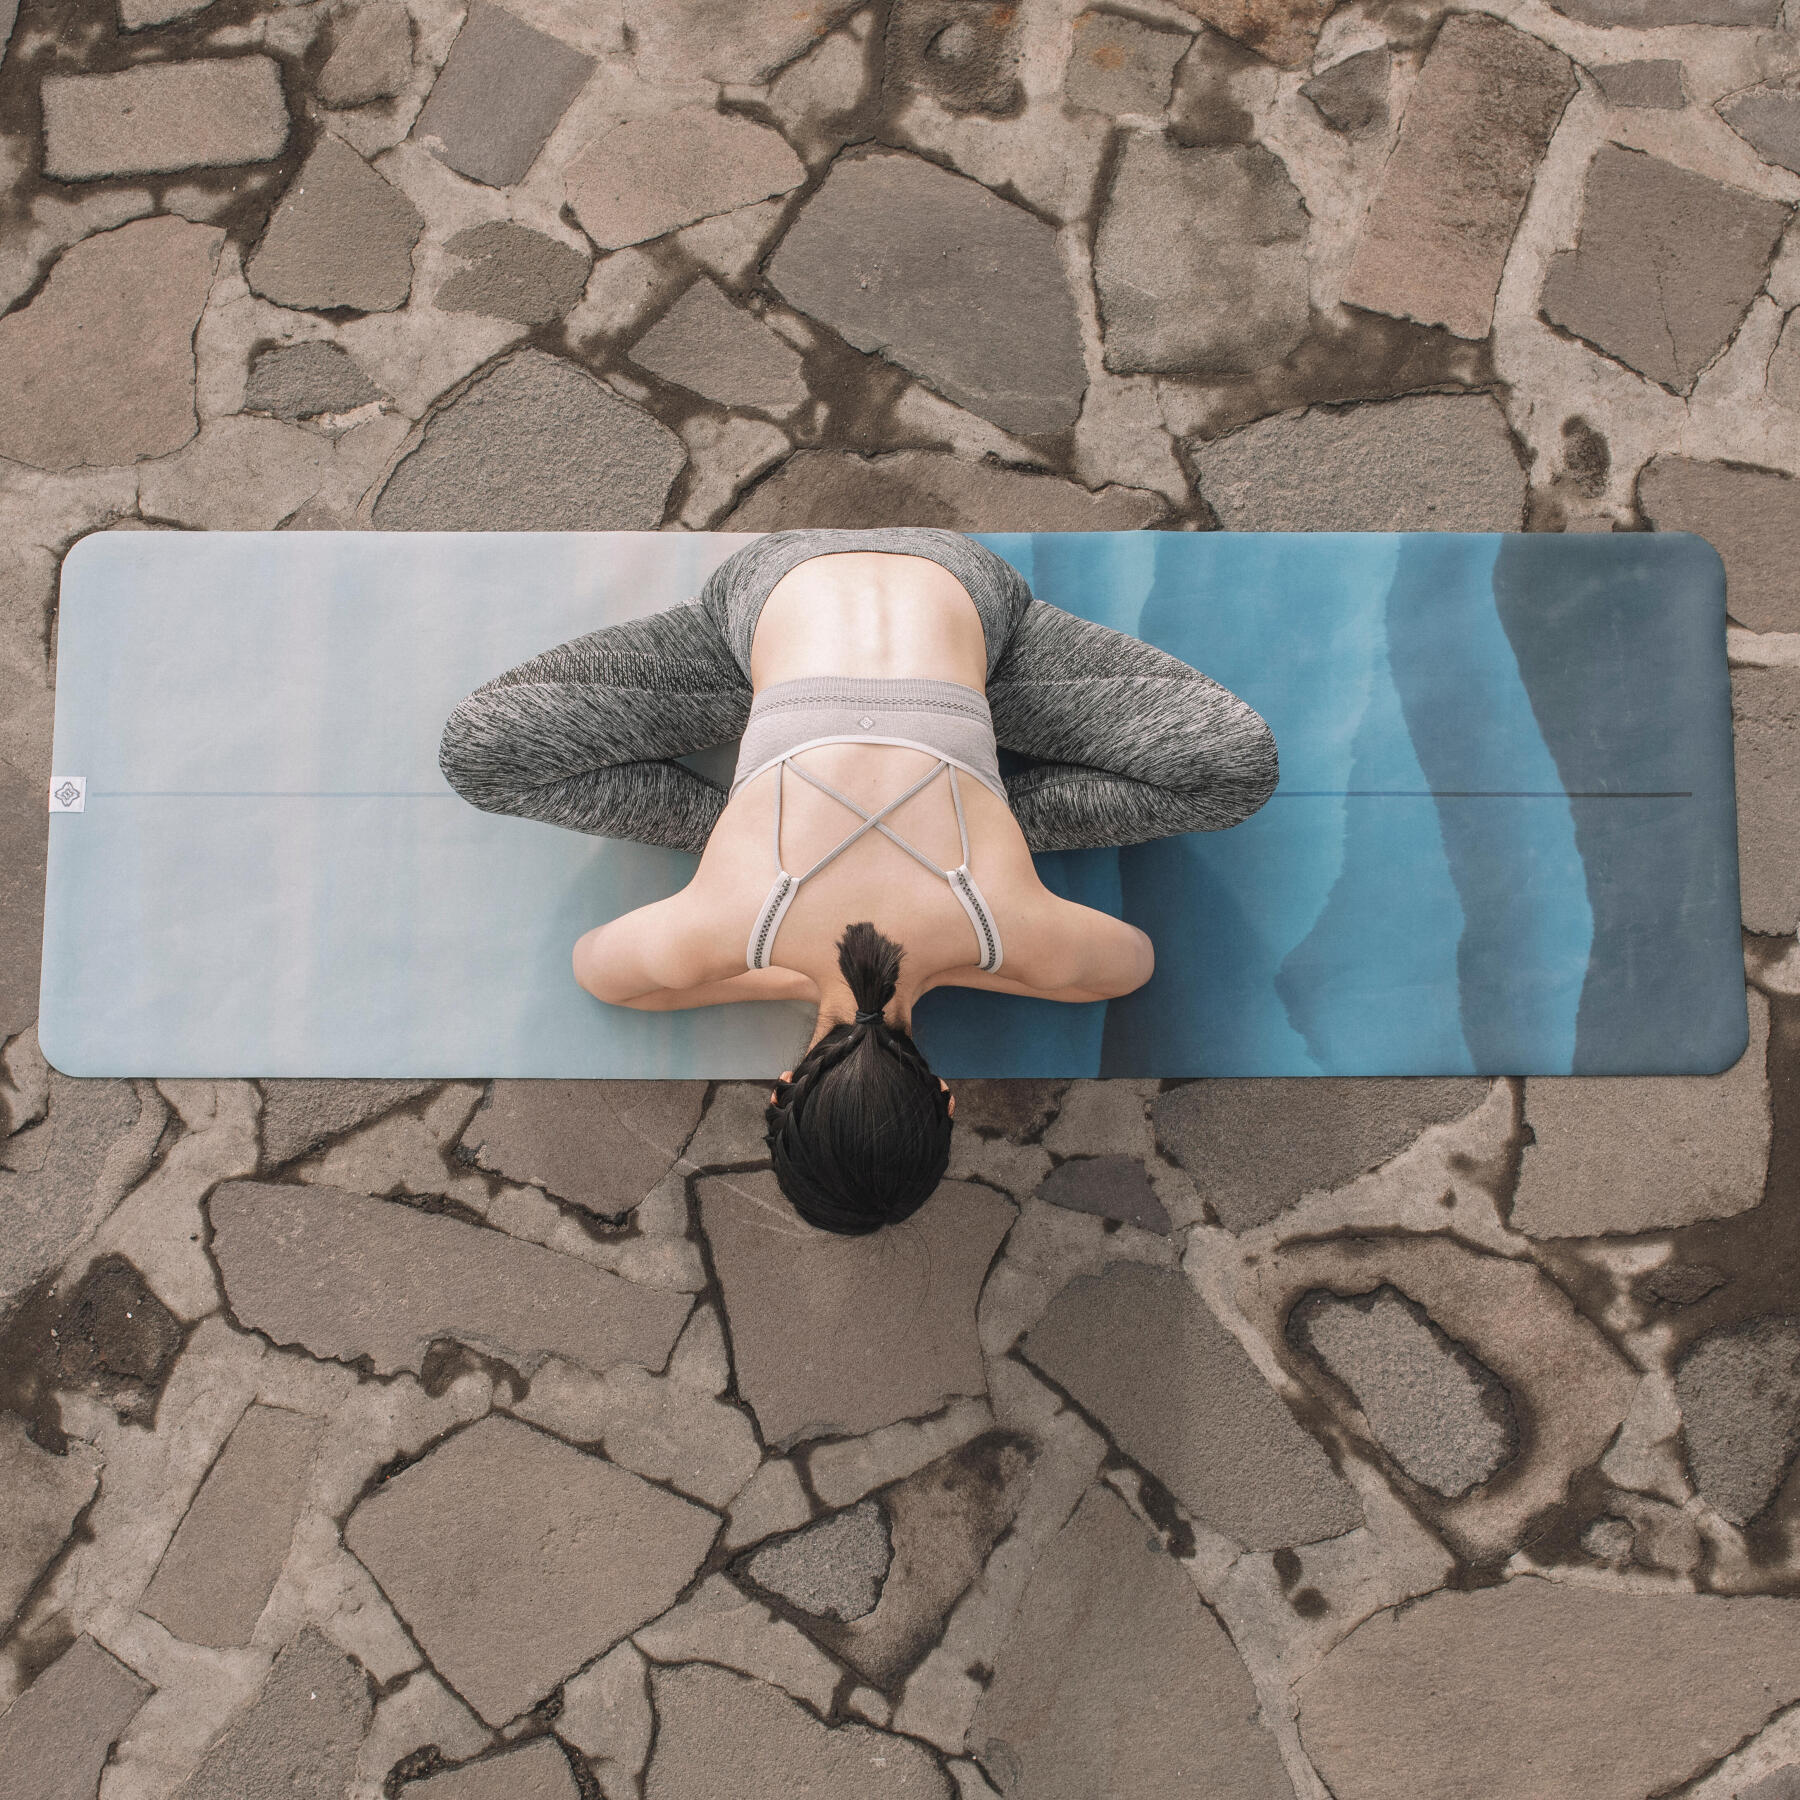
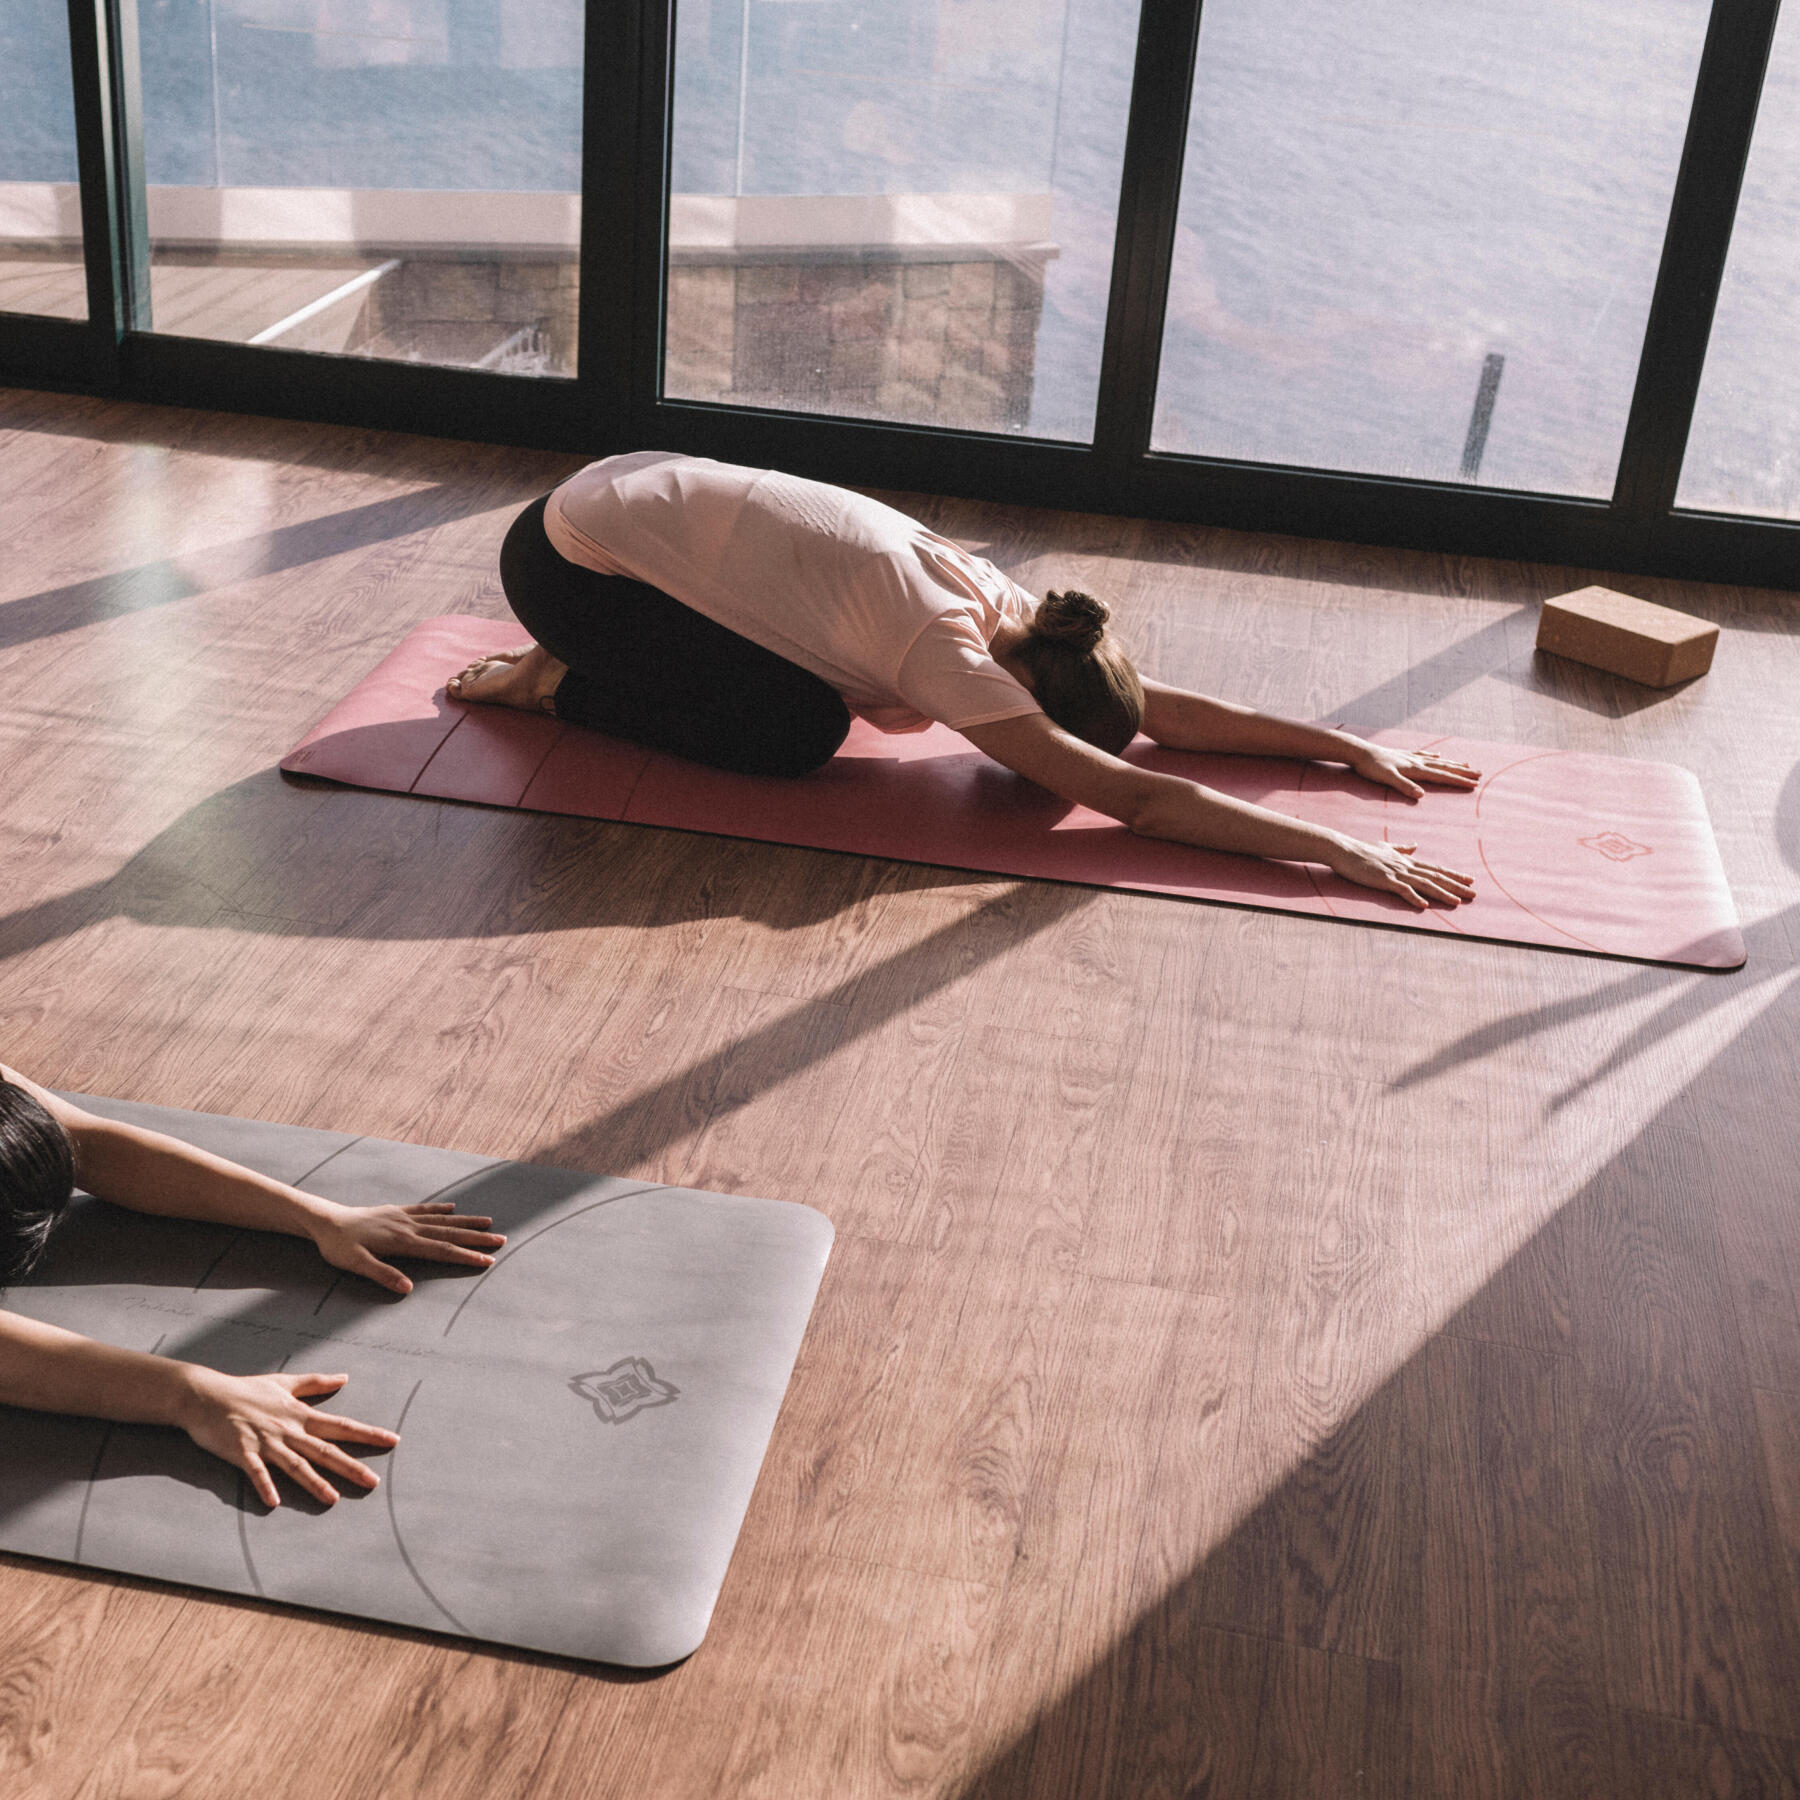
Thought yoga was only for the bendy? Think again!
This article touches on 4 simple yoga poses that can improve your flexibility – be it young or old, bendy or stiff. Do each pose 3 times, before moving on to the next one. And with each turn, push yourself a little harder. All you need is a mat (and a home #stayhome), let's get started!
- Kneel down with your arms outstretched and on the mat
- Your knees should be chest’s width apart
- Seat your bum back onto your heels while keeping your hands on the mat
- Slowly walk your hands away from your body, towards the top of the mat, while lowering your torso to the ground
- Keep your back straight throughout
- Once you have reached the limit of how low your torso can sink, rest your head on the mat (if it is within reach), or on a yoga block
- Remember to keep your neck in a neutral position i.e. not tensed upwards or downwards
- You should feel a spinal stretch from the base of your skull to your tailbone
- Stay in this position for a few minutes, and remember to breathe.~
~
Quick Tips: Place a rolled-up towel between your calves and thighs if you find it challenging to sit on your heels. If you experience pain in your ankles during the pose, try placing additional cushion beneath them, such as a folded towel or a yoga pad. Stretch out your fingers to get a good stretch in your hands too!
- Sit on your mat in an upright position, feeling your seat bones (the two small bones of the buttocks) in direct contact with the ground
- Bend your knees, allow them to fall to the sides, and join the soles of your feet together
- Draw your feet towards your pelvis, and lengthen your spine as though being lifted upwards by a string attached to your head
- Inhale deeply
- Then exhale, and lower your chest towards the ground and place your outstretched arms on the mat, in front of you
- Keep your neck neutral, back straight, and engage your core at all times by drawing in your belly towards your spine.
- Stay in this position for a while, before raising your torso back to an upright seated position
- With each inhalation, lengthen your spine, and with each exhalation, lower your chest towards the ground again, this time for a deeper stretch than previously if possible~
Quick Tips: If you find your back rounding at any point, sitting on a brick or folded towel might help. Raising your pelvis should make sitting upright and keeping the back straight throughout the pose easier. Do not bounce your legs or back when doing this stretch.
- Start on all fours on the mat - your knees should be directly beneath your hips and hands directly beneath your shoulders, fingers spread apart as though pushing something (or someone)
- Using your fingers and the base of your palms, push the ground away from you and lift your bum to the ceiling
- Keep your back straight and continue to lift your tailbone closer to the ceiling by straightening out your knees. Keep your neck in a neutral position.
- Gently lower and raise each heel, one after the other, to loosen out your hamstrings
- Once loosened, try to ground both heels onto the ground
- Keep your weight evenly distributed among your two feet and two hands
- Take five to ten deep breaths in this pose and then gently lower down onto your knees and return to child's pose (balasana)~
Quick Tips: If you find it challenging to ground your heels, bend your knees. If you find yourself tensing up the shoulders during the pose, try rotating your arms outwards - your shoulder blades should descend, which would help relax your shoulders. Push your weight to your feet instead of bearing it on your arms. It will help you to go deeper into the stretch and you'll be able to stay in that pose for a longer time.
- Lie on your stomach with the top of your feet, flat on the mat
- Put your hands on both sides of your waist, forearms perpendicular to the ground, fingers apart and pointing towards the front
- Take in a deep breath, engage your core, and raise your head, torso and thighs by pushing the ground away with your hands
- The tip of your toes will continue to rest on the mat
- Rotate your arms outward such that your elbows are pointing to the back of the mat
- Keep your chest open and shoulders down
- Keep your head in a neutral position and look straight ahead.
Quick Tips: The downward-facing dog and upward-facing dog poses are usually done consecutively, as it is easy (and pretty) to transition from one pose to the other. Make your flow more effortless (and pro) by shifting your body weight forward or backward while moving from one pose to another.
As with everything, practice makes perfect. Practicing the above yoga poses for 10 minutes each day over a period of time can improve your flexibility and lower your stress levels in noticeable ways. Remember to bring these two things to your practice: 1) an open mind and 2) steady, deep breathing. Namaste!